Saturday, December 11, 2010

Room4Dessert

Hello there! It's been a while, but the madness of school had finally slowed down so hopefully I'll have at least one more post after this one before Christmas. This one will be accompanied by recipes. I feel I've been a little chintzy on the recipe front lately, so apologies for that.

This week at school was our event/exam week. The final test this year culminated in an event, called Room4Dessert, for which people could purchase tickets and taste our final products. Each group of four was to come up with a verrine (layered dessert), two-bite pastry, preserve, bread or cracker, and two chocolates, one dipped and one molded.

After weeks of preparation, some not so successful test runs, a lot of stress, and more than a little frustration we finally came to end. And, it has to be said, quite successfully. I don't think I'm the only one who would say the event was a resounding success. Everyone turned out some fabulous desserts and the guests all appeared to enjoy themselves.

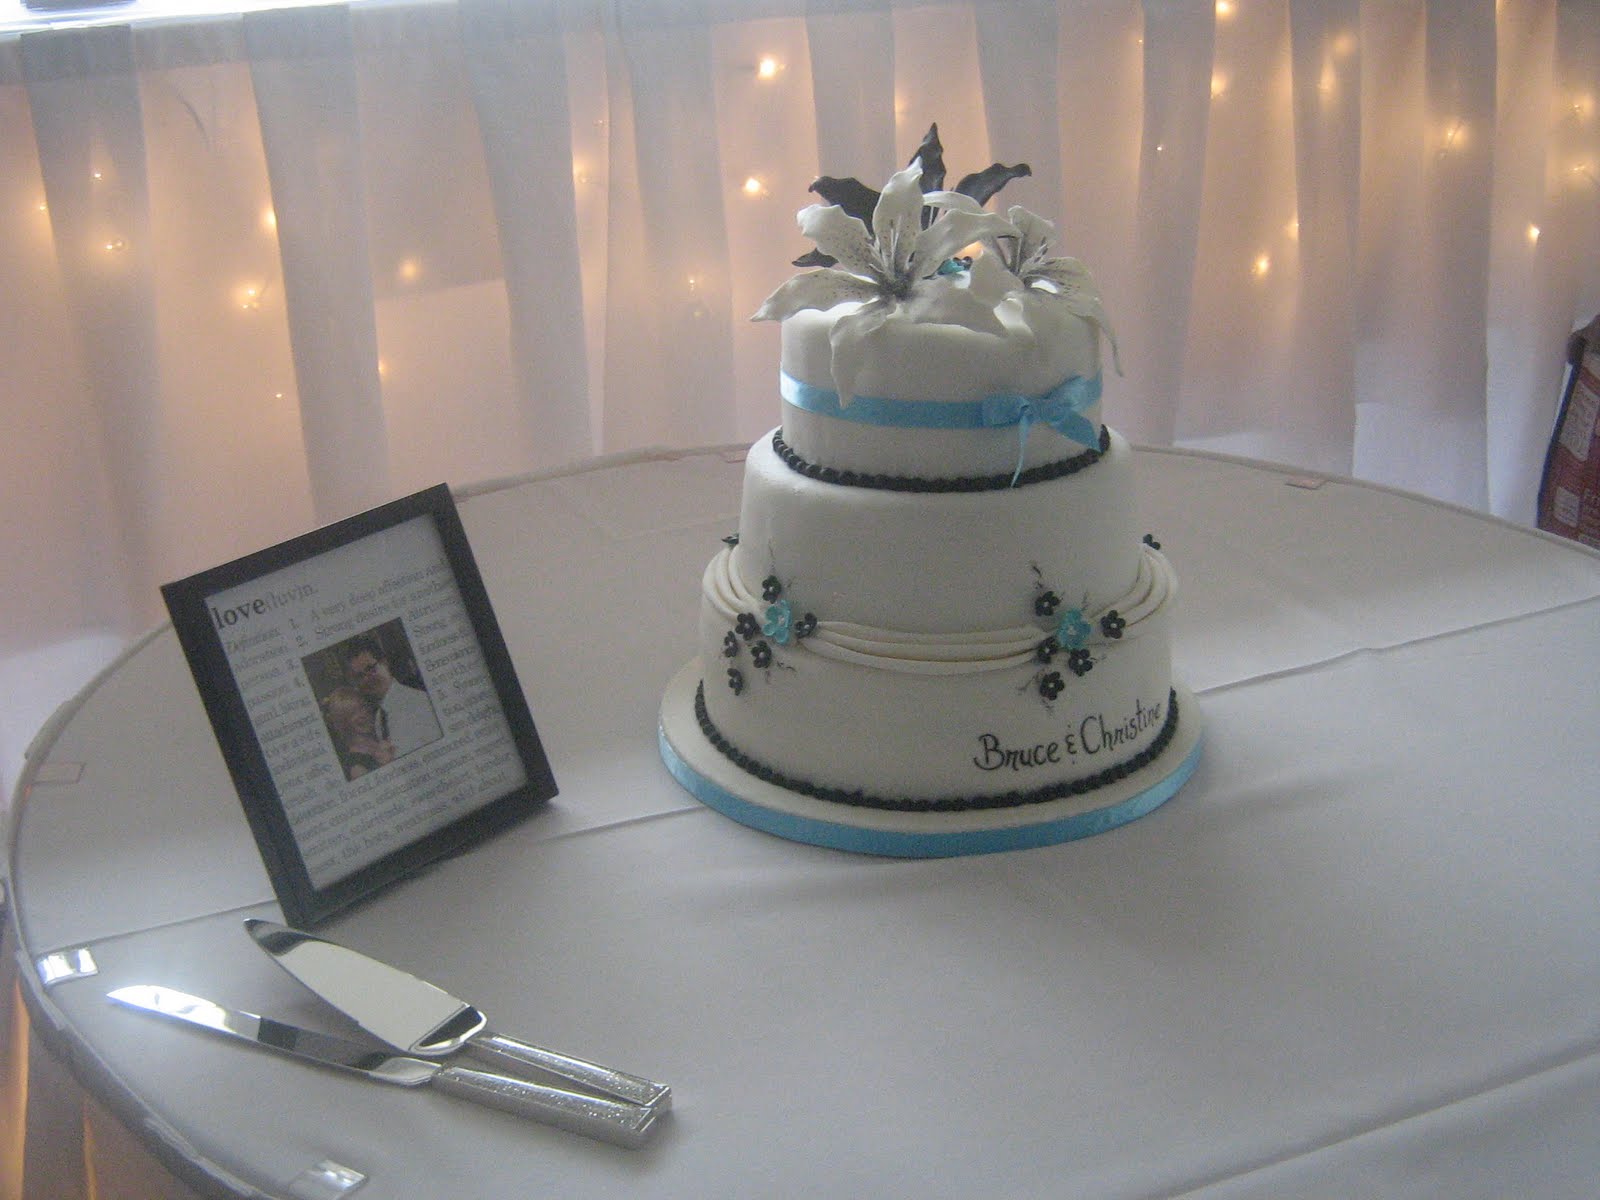
Below is a picture of my group's table. As you can see our theme was citrus. The chocolates were boxed and at a separate table.


Below is a closeup of our verrines. The were made up of a layer of lady finger sponge, a layer of lime chiboust, which is pastry cream with meringue folded in and set with a bit of gelatin, and a layer of gin and tonic jelly. We topped them with a dollop of whipped cream, a bit of candied lime peel, meringue bits, and a swirl of white chocolate.

The gin and tonic jelly was quite a favourite. It's really like a sweeter gin and tonic. It's light and has a gentle bite to it as the gin makes itself known. It's also quite pretty. It has a subtle yellowish colour and sort of glitters. Perhaps from the air bubbles that get trapped from the tonic water. I got the recipe from Nigella Lawson's How to be a Domestic Goddess and I've included it at the bottom of the post. It's like Jell-O for grown-ups.


Our two-bite pastry was a Grand Marnier savarin with cardamom mousseline on a citrus Britanny cookie with caramelized banana and orange. Everyone loved it. So you'll find full recipes for all of that at the bottom. Savarin is made with a yeasted dough that comes out rather dry and is then soaked in syrup. Traditionally they're soaked in rum syrup, but in keeping with citrus we changed it to Grand Marnier. The cardamom pairs beautifully with both the orange and banana, it's slight spiciness just lifts the flavour of the other two, balancing it nicely.


Lastly we had our cheese, cracker, and preserve. I don't have a closeup picture of those but you can see them on the far left of the table picture. The cheese we were assigned was Robiola Rochetta. It's made with a mix of sheep's, goat's, and cow's milk and has the consistency of cream cheese. It's quite mild, but definitely stands out with it's earthy flavour.

We paired it with a thyme cracker. The recipe which can be found at Martha Stewart's website. They're extremely easy to make and delicious. Crisp and a bit salty with the thyme adding extra flavour. They make you never want to buy crackers again.

The grapefruit marmalade we paired with it was quite tangy, but ended up with a nice flavour once we added some oranges after the fact. The recipe for that can be found here, but be sure to blanch the peel before making it by boiling it, draining it, and shocking it with cold water three times or you'll end up with some very bitter marmalade. Also, we had some thermometer trouble when trying to bring it up to the right temperature. I think perhaps going by the timing would work better than going by temp. Much longer and ours would have burned.


Below you'll see our chocolates. The molded one has a white chocolate Grand Marnier center and the dipped one with the candied mint on top has a white chocolate lemon mint center.


Overall we enjoyed the evening and we were happy with the outcome. It's always much more exciting when you get to watch people enjoy what you've made. It is the best part of baking, in my opinion. At the end of it, watching someone's face light up as they eat something you've made them.

Gin and Tonic Jelly from Nigella Lawson


300 mL Water
300 g Caster sugar
2 Lemons
400 mL Tonic water
250 mL Gin
8 sheets Gelatin

Boil sugar and water for 5 minutes.
Add lemon zest and steep, covered, for 15 minutes.
Strain out the lemon zest and add the gin, tonic water, and lemon juice. You should have 1200mL, if not, top it up with a liquid (gin, tonic water, or lemon juice).
Soak gelatin in cold water and boil 50mL of water. Squeeze out the gelatin to removed excess water and whisk into the boiling water.
Remove a about 1/2 cup of the gin mixture and whisk in the gelatin. Then return it to the rest of the mixture and stir it together.
Pour into a mold and let set for six hours.
If using a jelly mold set it in a warm water bath to loosen it before removal.

Grand Marnier Savarin with Cardamom Mousseline


30 g. Yeast

120 ml Water

334 g. Bread flour

20 g. Milk powder

40 g. Sugar

5 Eggs

6 g. Salt

166 g. Butter, melted

82 g. Mixed Peel or currants (optional)


If you have a stand mixer use the bread hook attachment.

Combine yeast and water in the bowl and mix together to create a slurry.

Place sifted flour, milk powder, sugar, eggs, and salt on top and mix.

Knead dough until the dough stretches when pulled gently to form a translucent 'window' so to speak. Pull off a small piece and gently pull it to check.

The dough will be very soft.

In a bowl place the melted butter on top and mix in thoroughly.

Punch down and rest another 10 min.

Add peel or currants to the dough.

Grease 3 standard muffin tins or savarin molds and fill half way.

Let sit in a warm place until the dough rises almost to the rim.

Bake at 385ºF until golden brown and unmold soon after they come out of the oven.

Pour the hot syrup evenly into the muffin tins (about half way) and place the savarins back into the tins to absorb the syrup.

Invert onto a drying rack so that any excess syrup can drip out.


Soaking Syrup


834 ml. Water

250 g. Sugar

Zest of 1 lemon

Zest of 1 orange

5 g. Vanilla, pure

Salt, pinch

120 ml Grand Marnier


Boil everything except the Grand Marnier and let sit for about 20 minutes to steep.

Bring back to a boil and strain to remove zest.

Stir in Grand Marnier.


Note: You can make the syrup ahead of time and store in the fridge. Just be sure to reheat it before soaking the cakes and add the Grand Marnier after you've heated it so that none of it cooks off.


Cardamom Mousseline


85 g. sugar

6 egg yolks

cardamom to taste

1 tsp. vanilla

1/3 cup (80ml) boiling water

1 1/2 cups (360 ml) 35% cream


Whisk together sugar, yolks, cardamom, and vanilla extract.

Whisk in boiling water and then whisk mixture over simmering water to ribbon stage. It will thicken and will not sink back into the mixture immediately when drizzled on top of itself.

Whisk to cool.

Whip cream and fold into cooled mixture.


To assemble place small segments of orange and banana on top of the savarin.

Pour about 1/2 tsp more of Grand Marnier over each one.

Top with a dollop of mousseline and a piece of caramalized banana.


Note: To caramelize the bananas, cut rounds into thirds and toss in sugar. Using a creme brulee torch, torch each piece to brown. Alternatively cook them in a pan on low heat.


Sorry about all the metric measurements. They're my school recipes. I will try and convert them and update this as soon as I do. On a related note, a kitchen scale is very handy to have, especially when working out of British cookbooks, which always use metric measurements.


Sunday, November 21, 2010

Polka Dots and Bows

Oops. It's been a long time since I posted. This is going to be short and sweet because I'm too busy to actually make anything worth posting about. I just wanted to share with you this baby shower cake I made recently. I was quite happy with the outcome. I really do like making cakes. This was chocolate on the inside with chocolate ganache and vanilla buttercream.


Hope you like it!

Tuesday, October 19, 2010

Cupcakes and Orchids

Here they are, as promised, the pictures of the wedding cake. Unfortunately I forgot my camera at home so the only photos I have are the ones that I pilfered from my cousins on Facebook.


For the 6" cake top tier I used the white velvet cake found in Rose Levy Berenbaum's The Cake Bible. It can also be used to make cupcakes, though I didn't use it here. Instead I used a recipe of Lucy Waverman's found on the LCBO website. The icing is Italian buttercream, piped on with a #9 star tip.

It needs to be said that I am in love with Italian buttercream. It is so delightfully creamy and smooth. Every time I make something with it for people at work, one of my co-workers will comment on it. Not only is it delicious, it is also extremely stable. While it won't stand up to extreme heat in mid-summer, it sets up fantastically and can remain out of the fridge for hours on end, and even several days. Since I feel I owe you a recipe after such long gaps between posts, I will provide the recipe for Italian buttercream. People tend to be intimidated by it, but I promise it's not difficult. It just requires good timing and an accurate thermometer.


Before I get into that though, I just want to point out my gumpaste orchids. I was rather happy with them, having never made gumpaste orchids before. So, yes, I just want to brag a little. One of these days I'll have a post on making gumpaste flowers. It's really not as hard as it looks; it merely requires vast amounts of patience.

On to the buttercream then.

Italian Buttercream from Anna Olson's Another Cup of Sugar
12 egg whites
1/2 tsp cream of tartar
pinch of salt
1 cup sugar
1 1/2 cups sugar
1 1/2 cups water
4 1/2 cups butter
2 tsp vanilla extract

Whip egg whites with cream of tartar and salt until foamy. Gradually add 1 cup sugar while whipping and whip to soft peaks.
Boil 1 1/4 cup sugar with the water, without stirring, until it reaches 115C on a candy thermometer (soft ball stage).
Remove from heat and carefully pour down the side of the bowl of egg whites while whipping. Continue whipping until it has all been added and until the whites have cooled to room temperature (about 5 minutes).
While beating, gradually add in butter. Beat until smooth and add vanilla.
If using that day, keep at room temperature. It will keep in the fridge or freezer for quite some time, but be sure to bring it to room temperature before using and beat it to bring it back to a spreadable consistency.

A Couple Notes about Italian Buttercream:

1. The cream of tartar serves to help the egg whites whip up better. I have made the recipe without it and not encountered any problems, but I would recommend some kind of acid. If you don't have cream of tartar, throw in a teaspoon of lemon juice. It will do the job just as well.

2. If you don't have a thermometer you can scoop a bit of the sugar mixture and drop it into cold water. If it forms a 'soft ball' then it's ready. I do highly recommend a thermometer though.

3. DO NOT let it cook over 115C. If you do it will solidify when it hits the egg whites and not distribute properly throughout the mixture. The sugar is effectively cooking the egg whites into an Italian meringue so it is a crucial step. Make sure your thermometer works (test it in boiling water, it should be 100C) and calibrate it often.

4. Cooking sugar makes a lot of people nervous, so here's a good watch point: the majority of the cooking time is used mostly to boil off the water (which serves to prevent the sugar from burning); you can leave it largely unattended as long as you still see a significant amount of steam coming off it; as soon as the steam starts to dissipate keep a close eye on it; it only needs to cook for a couple more minutes past that point and the temp will climb quickly once the water is gone.

5. It is extremely important that you bring the egg whites back down to room temperature before adding the butter. If you don't, the butter will melt and you will end up with a curdled mess.

6. Another note on curdling: the icing will look as though it's curdling after you initially add the butter. Keep beating it and it will come back together. If it doesn't, see previous note, as that is likely the problem.

7. This is a gigantic recipe that only just fits in a very large bowl. It is intended for a four tier wedding cake (though I used three times the recipe for 150 cupcakes). So cut it in half, or quarter it. Whatever you feel comfortable with. You can always freeze the leftovers.

I swear it's not as scary as it looks. You just need to keep an eye on the watch points and you'll be fine. You can actually put the sugar on to cook right before you whip your egg whites and by the time they reach soft peaks it will be a few minutes away from the right temperature. It saves a lot of time. Organization is key. Make sure all your ingredients are ready to go before you start.

It's a very versatile icing, and people love it. So please give it a try. You will not be disappointed.

Monday, October 11, 2010

A Cup of Tea

Well, that was more time than I intended to pass without posting. Alas, I have been quite busy, most recently with my cousin Jenna's wedding cupcakes. Pictures of that will be posted soon. Until then I have something else for you.

After the British invasion that took place for the wedding (the groom hails from the Mother country) it seems appropriate that I talk about tea. In the early hours of the morning I may favour coffee as my drug of choice, but when I'm writing I consume tea like a fiend. A Boston Harbor's worth of it.

That being said I can't believe I've waited this long to post this recipe. It has been so ingrained in my repertoire for the past few years that I think I just took it for granted. This recipe is the reason I keep ginger root in my freezer and whole cardamom pods in my spice cupboard. It is none other than chai tea.


And I'm not talking about that stuff you get in teabags or those lattes you get at Starbucks. The tea pictured above does not presume to be chai tea all on its own. It is merely a humble Darjeeling waiting to be turned into a nice cuppa.

For those of you unfamiliar with chai tea, it is a lightly spiced and sweetened tea that originated in India. There are many recipes out there for chai tea, but I stumbled across this one a while ago and like it so much that I've not been tempted to try any others. By no means is this the final word on chai tea.


This particular combination consists of cardamom, cinnamon, ginger, and cloves. Some also use star anise and other spices. I enjoy the subtle spiciness of this one. It is not overpowering, nor is it cloyingly sweet. It is warm and comforting on a cold day. Its flavour manages to be both familiar and slightly exotic. It is easily one of my favourite drinks.


So as not to tease you further, here is the recipe:

Chai Tea

1/2 inch piece of fresh ginger
1/2 inch piece of cinnamon stick
3 whole cloves
2 cardamom pods
1 1/2 tbsp loose black tea (Darjeeling or Assam)
1 tbsp raw sugar
1 cup water
1/2 cup milk

Combine all ingredients in a pot and bring to a boil.
Reduce heat and simmer gently for 2-3 minutes.
Strain through a fine sieve and enjoy.

Make sure you don't let it boil over. I say this not because I think you're negligent, but because I boil it over nearly every time, almost without fail. I think it is similar to the way I burn grilled cheese sandwiches. My attention span fails me.


It makes one large mug of tea, or two very small ones. It doubles quite easily. I always serve it in my giant, green Tinkerbell mug. Firstly because it is the only mug I own that fits the whole thing, and secondly because of the inscription 'Sugar and Spice' on the inside rim of the mug. I find it too appropriate for the tea to pass up.

So even if it doesn't inspire great words to be put down on paper, at least it's delicious.

Saturday, September 25, 2010

An Apple a Day

Nothing says fall like apples. I go through stages of falling in love with certain foods and it is always a love bordering on obsession. My first true food obsession was with apples. They are endlessly versatile, a quality that is often the spark for my fickle love. It's hard to go wrong with apples. Applesauce, apple butter, apple stuffed pork, caramel apples, baked apples, apple cider, the list goes on.

I think the love of apples is fairly universal. Why else would they feature in so many of our recipes? It's also one of the only fruits that people know by variety. An orange, for the most part, is an orange (yes, I'm going to compare apples and oranges), a banana is a banana, grapes don't go much past red and green. But apples we know. Braeburn, Granny Smith, Golden Delicious, MacIntosh, Northern Spy, Royal Gala. These are names people recognize. Because we treat our apples differently than other fruit. We give them a bit more respect.

Apples will always remind me of fall. Their crisp sweetness reminiscent of a fall breeze cutting across the hot summer air. Their flavour grounds us after the heady heat of the previous season and gives us something to look forward to. And what better way to usher in autumn than with apple pie?


I love apple pie almost any time of year, but something about baked apples begs to be paired with trees that are on fire with colour. They caramelize so beautifully in the oven. Their sweet juices reach a deeper level of flavour, one that's not too sweet if properly spiced.

The trick to apple pie is two-fold. The first is the apples. They have to be fresh and crunchy. Soft, overripe apples will turn to mush in the oven. Pick ones with a good balance of sweet and tart. Cortland, Gala, Granny Smith, and MacIntosh all work beautifully for baking. I used a combination of Royal Gala and Granny Smith for this pie. I always like throwing in some Granny Smith apples because their tartness is tempered when baked and it's a sure way of making sure your pie isn't too sweet. The second factor is your pie crust. I'm not going to pretend to be a master of pie crust, but the key to flaky pie crust is to avoid overworking it. Mix it only until it just comes together, don't use too much flour when rolling it out, and don't re-roll it. Try to get it right on the first shot.

The recipe I'm going to give you is one that I got from Williams-Sonoma's Pie and Tart cookbook. One thing I find can destroy a good pie is too much crust...no matter how flaky it happens to be. This recipe eliminates that problem by topping it with streusel rather than more pie dough. It's like a cross between a crisp and a pie, bringing the best elements of both together.

Apple Streusel Pie

Basic Pie Dough
1 1/4 cups flour
1 tbsp sugar
1/4 tsp salt
1/2 cup cold butter, cut into cubes
3 tbsp very cold water

Streusel Topping
1/2 cup flour
1/3 cup brown sugar, packed
1 tsp ground cinnamon
1/4 tsp salt
5 tbsp cold butter, cut into cubes

Apple Filling
6 apples, peeled, cored, and diced
1 tbsp lemon juice
1/3 cup sugar
2 tbsp cornstarch
1 tsp ground cinnamon
1/2 tsp ground nutmeg
1/4 tsp ground cloves
pinch of salt

For the pie dough, combine the flour, sugar and salt.
Cut in the butter with a pastry blender or two knives until it resembles cornmeal with no butter pieces larger than a small pea. (You can also use your fingers to blend this, just be sure not to soften the butter too much with your body heat.)
Add the water and mix with a fork just until it comes together.
Form into a disk and tap a few times with a rolling pin to flatten it.
Roll out to at least 12" in diameter and place in 9" pie pan.
Flute the edges and refrigerate until ready to use.

For the streusel, combine flour, sugar, cinnamon, and salt.
Cut in butter as with pie dough.
Refrigerate until ready to use.

For the filling, toss diced apples with the lemon juice (this stops them from going brown).
In a separate bowl combine sugar, cornstarch, spices, and salt.
Sprinkle over apples and toss to combine.

To assemble, pour apples into pie shell and cover evenly with streusel topping.
Bake at 375F for 50-60 minutes until the topping is golden and the filling is bubbling.

This is best eaten the day it's made. If you don't finish it the day of, keep it at room temperature if it's only going to hang around for a couple days. The cold of the fridge will break down the cornstarch causing the filling to go soupy.


As always feel free to play with this recipe. I mostly stuck to it this time, but I didn't have ground cloves so I added a bit more cinnamon and nutmeg (not too much though, these are potent). The variety of apples will change the flavour, so try different kinds until you find the one you like best. Add different spices for variety. Throw in some raisins. Whatever catches your fancy.

Above all, eat apples. After all, they're said to keep the doctor away. Let's dig in to an autumn full of apples.

Saturday, September 18, 2010

Nice Day for a White Wedding

This week has been extremely busy. I've had work on top of school on top making a wedding cake for this past Friday (yesterday). Needless to say I'm exhausted. But also quite satisfied. Because yesterday was my first official wedding cake. I'd made one before for a wedding cake competition, but it was made of foam and wasn't for someone's actual wedding. After hours of hard work (and some near meltdowns...okay, maybe real meltdowns), the stress of the week paid off. Did I mention that my mom is entirely responsible for maintaining my sanity? Truly I'd be lost without her.


I was very happy with the result. I don't think there's anything more satisfying than putting the final touches on something and having it come together. Like the final brushstrokes of a painting.


Making the lilies was fun. They start off looking like white blobs, but once the petals are tied together and the details are painted on they almost look real.


Piping the black border was a bit terrifying because the slightest mistake and the black will stain the white fondant. But I had success.


Even more intimidating was writing their names on the bottom tier. I think it turned out pretty well. I used one of those food pens with the edible ink. I didn't trust myself with a paint brush. I barely trusted myself with the pen.


During the baking of the cake I had a moment of crisis where I began to question my desire to be a cake artist, but the final result restored my resolve.

On an entirely separate note I made an impromptu chunky tomato sauce about a week ago. It turned out far better than expected for something that I made out of the contents of my cupboard. It was slightly garlicky, with the rosemary adding subtle earthiness. And it was fabulously substantial. Chickpeas and zucchini gave it enough body to be a meal.

As I'm sure you know by now, I love food that is both delicious and easy. So without further ado I will give you the recipe for my fast and tasty chunky tomato sauce.

Tomato and Chickpea Chunky Sauce

16 oz can of chickpeas
28 oz can of diced tomatoes
1 zucchini, diced
2 cloves garlic
1 tbsp olive oil
1 tsp rosemary

Heat olive oil in a large skillet. Add garlic and cook about 30 seconds.
Add rosemary and zucchini and cook until softened.
Empty tomatoes into the pan and heat through.
Rinse chickpeas and add to tomatoes. Simmer until heated through.


Serve over pasta or rice, or just eat it on its own. It will keep in the fridge for several days. It was my staple dinner last week when I had no time to cook anything else. Just reheat it gently or zap it in the microwave. Enjoy!

Wednesday, September 8, 2010

Cuteness and Cake

Today I have for you a cake that I made. The type of cake is not really what matters. I just wanted to show you the finished product. And I have to let you know that none of this would have been possibly without my mom. She helped A LOT.

This was for a baby shower for a friend of my mom's and the theme was jungle animals. With a lot of help from the internet, and some determination, I managed to pull it off.


Here's the sleeping baby monkey underneath the palm tree.


And the giraffe, the elephant, and the bear. The bear is slightly random, as I don't really think there are bears in the jungle. But she's cute, so she's included in our safari (which incidentally is not a jungle thing, but we'll disregard that).


These two guys were my favourite, but I can't take complete credit for them as I got the inspiration for them on Etsy.


The palm trees were the hardest part. They caused us some problems. First the leaves were breaking. Then the royal icing wasn't really holding the way royal icing should. Then we had to cover the tops with infinite flowers and coconuts to hide the mess. But it all ended well with the help of my mom's handy dandy glue gun. I don't recommend this if you want the whole thing to edible, but as long as the people eating the cake are warned, I don't see the problem.


So there you have it, the first of many (hopefully). Next post I'll have a recipe for you.

Friday, September 3, 2010

Vacations and the Last Days of Summer

Hello friends! Hello September!

I have lots of pictures for you today, having just gotten back from Portland, Maine. No pictures of the beach just yet, since I went old school and used my film camera for those. But I have lots of pictures of the food I ate.

It was the perfect way to spend the last days of summer. On the beach with a book, eating good food and doing absolutely nothing else. We stayed at Inn by the Sea, which is not only located right on the beach, but has the added bonus of housing an awesome restaurant.

This is a picture of our wine the first night we were there. That's my sister's crazy eye behind the bottle.


And the amuse bouche. I love amuse bouche. It sounds so fun, so quaint and French. This particular one was a ginger carrot soup. It was lovely. Lightly spicy with toasted coconut sprinkled on top. And I don't even like coconut.


The focaccia was exactly as it should be. Slightly crisped up and very subtly salted. Served with olive oil and ground pepper. I had to exercise great self control not to eat the whole basket of it myself.


Then came the seafood and lobster paella. It had been far too long since I'd eaten lobster. I'm really picky when it comes to lobster so I tend to only eat it when I'm on the east coast. Since I haven't been down east for a while my consumption of lobster has dropped drastically. I'd forgotten how much I missed it. The mussels and clams were delicious as well, but oh the lobster. I have no words for describing it, except that it's all I want to eat for the rest of my life.


For dessert we had blueberry shortcake. That's my mom's fork going in for a bite there. It was accompanied by an absolutely divine blueberry sorbet. Both were made with wild blueberries (from Maine), so I'm sure you know how I feel about it. This is how blueberries were always supposed to taste.


Now I have two words for you: Eggs Benedict. I love eggs Benedict. I mean truly love them. They represent everything that is wonderful about eggs. Poached to perfection, sitting on top of a salty piece of Canadian bacon, and an English muffin (made fresh in house). Of course the clincher is the hollandaise sauce. Sometimes I am disappointed when I order eggs Benedict, by mediocre hollandaise. Not this time. It was smooth and creamy, with that slight tang that makes it so good. One of these days I'll try my hand at hollandaise sauce, but for now I am content with ordering it at nice restaurants.


This lovely beverage is called a Sunset Martini. So called because of the subtle gradation of colour from red to orange. It was a mixture of orange juice, pineapple juice, vodka, and grenadine. As soon as I figure out the perfect ratio I'll let you know. It tasted like summer, citrusy and sweet, it tickled my tongue without being cloying.


This particular amuse bouche consisted of yellow watermelon topped with feta and a drizzle of balsamic. So simple, yet so effective.


This next one was actually ordered by my mom and sister. It was a mushroom tart, topped with arugula. And it. Was. Good. It makes all other mushroom tarts look like amateurs. Earthy mushrooms, complimented by nutty arugula and the slight tang of goat's cheese. And that balsamic drizzle to tie it all together. I'll have to see if I can recreate this one as well.


Butter poached lobster with gnocchi. Because I couldn't get enough lobster. Really I don't think there's any way this dish could have gone wrong. It's lobster poached in butter. And can you ever go wrong with butter?


These were my mom's scallops, which I had to take a picture of because it was one of the biggest scallops I'd ever seen. Again, scallops are something I only eat when I'm down east because I find they have a tendency to be rubbery sometimes. Not these ones. These were the definition of melt in your mouth scallops.


I was so taken by this buttermilk panna cotta that I had all but finished it before I remembered to take a picture. Needless to say it was delicious. Silky and creamy and sweet. It was also topped with roasted strawberries (yum!)


We also tried a peach sorbet, which I don't have a picture of. It was spiced with something, but when I tried to ask what it was, they told me it was just peaches, and all the regular ingredients in ice cream. I don't believe it for a second. So now I'm on a mission to replicate this peach sorbet. I'm starting with ginger and allspice, maybe cardamom. I'll let you know when I figure it out.

All food aside, the vacation was exactly what I needed. Nothing to do, no one to see, nowhere to be except the beach. I could get used to that.

But it's back to school on Tuesday. Time to usher in the fall and all the glorious food that goes along with it. Time for apple crisps, and pumpkin pie, apple stuffed pork, and cranberry sauce, sweet potatoes, and turkey dressing. Bring on autumn. It is my favourite season after all. And I'm ready for the sweater weather and all the warming comfort food that goes along with it.

Thursday, August 26, 2010

Food in a Hurry

Today I did a deep clean of my apartment. I dusted, I swept, I got down on my hands and knees and scrubbed the floor. It was slightly terrifying actually. Not the work involved, but the dirt that managed to accumulate between now and the last time I cleaned (a date too far back for me to admit to).

My bedroom was the most frightening. I didn't even know that a single room could hold that much dust. The floor was so covered in it that as I swept it leaped off the floor in torrents, much to my dismay, while still leaving a substantial amount in a pile. Needless to say I'm going to have to sweep again shortly when all the flying dust has decided to settle again. *Sigh*

There was also a rather horrifying moment when I thought I'd swept up several little black beetles (not something I want in my apartment). Luckily they turned out to be flax seeds. The fact that I even entertained the possibility of my apartment breeding bugs is a sign that I need to clean it more often. Lesson learned.


Anyway, the point of all this cleaning talk is that the whole process took about four hours during which time I needed to eat. If you're anything like me when you clean, you run on momentum for much of the process. Once I break my cleaning groove I don't really want to go back to it. I will find myriad other ways to put it off. Honestly the only thing that really induces me clean is the prospect of studying for exams. Otherwise I have to force myself.

Midway through my cleaning frenzy I was hungry. So I turned to my old standby for fast, decent food: eggs. I dearly love eggs. There are so many things you can do with them (just take a look at French cooking) and they are gloriously quick to make. You can literally whip up an omelet in about ten minutes. Soft boil eggs in about five.

Recently I had seen something else with a bit more substance though: baked eggs. I can't remember which magazine they were in, but they were nestled in ramekins with a bed of spinach and a layer of cheese and they looked delicious. I happened to have spinach in my fridge so I decided to give it a go.

I have one word for you: delicious. Now I also happen to love any kind of green. I can almost see my mom cringing at the thought of the spinach, wilted before being baked in the oven. She hates cooked spinach. Perhaps the reason I like it is that she never force-fed it to me as a child. Whatever the reason, I will eat any greens you put in front of me. Bring on the bok choy, the Swiss chard and rapini. Yum. My mom would disagree. If you happen to share her opinion, you may want to pass on this.


It's really easy to make and, as mentioned previously, really quick. I threw goat's cheese on top because it was what I had in my fridge, but by all means use any cheese you want. Cheddar would be divine.

Baked Eggs with Spinach

1 egg
1 clove of garlic, minced
1 tbsp olive oil
A good sized handful of spinach
1 tbsp of goat's cheese, crumbled

Heat the olive oil in a skillet over medium-low heat.
Cook the garlic until aromatic, about a minute or so.
Toss in the spinach and cook until wilted, another minute or so.
Place spinach in a small ramekin and make a well in the middle.
Crack the egg into the well and sprinkle cheese on top.
Bake in the oven under the broiler for about 10 minutes.

Other than the egg and the garlic these measurements are very rough. I didn't measure anything. To give you an idea about the amount of spinach, just keep in mind that it will shrink substantially when you wilt it. You'll probably need more than you think you do. The timing is also rough. I didn't pay much attention to how long it took to bake. I just pulled it out when it looked done. Really it depends how well done you want your egg to be.

It's really very tasty. I highly recommend it. Especially if your in a pinch and need to eat fast. Take a break from your study session or your cleaning spree, your latest novel or your work presentation, and have some eggs.

Saturday, August 21, 2010

Blueberries Worth Mentioning

This is going to be short and sweet. I just needed to talk about these blueberries. It's been a while since I've had wild blueberries. So long, in fact, that I had begun to believe they were just like ordinary blueberries, except smaller. Not the case. At all. They are sweeter in a more subtle way, with a fuller, more rounded flavour.


I was casually making a spinach salad and decided to toss in some blueberries. I popped a couple in my mouth and they burst into deliciousness between my teeth. I stopped abruptly, all thoughts of the salad gone from my mind. I had forgotten blueberries could taste this good. I proceeded to eat an entire handful before remembering my salad.


They became the staple in my yogurt parfait the past few days. And this morning I left out the granola entirely (not just because my sister ate the last of it). Sadly I finished off the remainder of the berries. I'll have to buy more tomorrow. So I can eat as many of these blueberries as I can before the summer's out. I recommend you do the same.

Sunday, August 15, 2010

Granola Parfait

I was toying with the idea of starting this post with an apology because it's been delayed far longer than I intended. However, it's going to get monotonous if I keep allowing ten days to lapse between posts. So I'll just say that I'll try my best to keep them coming, but I make no promises. Onward then.

Today I am addressing one of my favourite breakfast treats. Well, actually I'll eat at it just about any time of the day. It is the yogurt parfait.


First experienced at Starbucks with fruit and granola I was enamored by the first bite. Truly, fruit, yogurt, and granola belong together. The wonderful thing about it is its versatility. If you're like me, you're a bit of a creature of habit, but at the same time get bored by constant, unending repetition. Herein lies the secret of the yogurt parfait. You can change up the yogurt, you can change up the fruit, you can change up the granola, all the while keeping the essentials the same.

My personal favourite combination involves Greek style plain yogurt (the unsweetened kind), a good squirt of honey, homemade granola, and whatever fruit I have lying around (though I'm partial to strawberries). The tangy bite of the yogurt perks up your taste buds for the smoothly sweet honey. Strawberries add their own sweetness and occasional tang. Bananas are divinely sweet, lending a softness to both flavour and texture. Granola adds complexity and, of course, that ever satisfying crunch. But don't take my word for it. Try it. Change it.

Opt for plain yogurt sweetened with brown sugar (like my sister Laurelle). Toss in some fresh blueberries, or dried fruit in winter. Dried cherries are my absolute favourite in the dehydrated fruit department. And the granola. If you make it yourself there truly are unlimited ways of changing it. Even if you don't, store bought varieties abound. So take your pick.

Ever since making the granola we sell at work I have been preoccupied with the desire to make my own granola. I know. I don't think anything epitomizes hippie food more than granola, let alone homemade granola. But so be it. There are so many things you can do with it to make it your own. Change the nuts, change the seeds, change the spices, add whatever dried fruits you want. Seriously, you won't be disappointed.

Just to get you started here's a recipe that I adapted from Jamie Oliver. He calls it Honey Cherry Granola, but I left the cherries out since Laurelle didn't want them. Of course any dried fruit will do. So I'll just call it Honey Bunch Granola. Perhaps it's a bit too quaint, but I like it anyway.

Honey Bunch Granola
Adapted from Jamie Oliver

2 tbsp vegetable oil
6 tbsp honey
1 tsp vanilla extract
1/4 tsp ground cardamom
3 3/4 cups rolled oats
1/4 cup sliced almonds
1/4 cup chopped pecans
4 tbsp sunflower seeds
4 tbsp flax seeds

Preheat the oven to 300F.
Mix together the oil, honey, vanilla, and cardamom.
Toss everything else together, then add the liquids. It's easiest to use your hands to mix it together. This ensures that everything is well coated.
Spread the mix out on a baking sheet and bake for 25 minutes.

Jamie Oliver recommends 6 tbsp of cherries. You can, of course, add any dried fruit you like. Just make sure you add it to the granola after it comes out of the oven. Otherwise you'll end up with some seriously dried out fruit. The original recipe also calls for sesame seeds rather than flax seeds. I don't really care for sesame seeds so I switched it. The cardamom was my addition and can be substituted for cinnamon, nutmeg, allspice, whatever you want really. The flavour of honey (buckwheat, wildflower, etc.) will also change the flavour of your granola, so experiment with that until you find one you like best.


Really just play with the recipe. And eat it any way you want. While I wholeheartedly recommend it with yogurt it would be delicious eaten with milk as a cereal. Or even just in handfuls as a snack. Let me know if you come up with any fantastic or inspired innovations of your own.

For breakfast, for lunch, for whenever: c'est parfait.

Wednesday, August 4, 2010

Peachy Keen

"The first week of August hangs at the very top of summer, the top of the live-long year, like the highest seat of a Ferris wheel when it pauses in its turning."
-Tuck Everlasting
, Natlie Babbitt

August always reminds me of Tuck Everlasting and that first opening sentence. It is a sultry month, and the word itself seems weighed down by the humidity that accompanies it. August. It sounds thick and heavy, barely ruffled by a breeze. It sounds like the electric buzz of cicadas as they hum in the trees. It sounds like a bonfire, like the crack of ice cubes in a cold drink, like stillness. And it tastes like peaches.

In fact the peaches were early this year. Truthfully, peaches are far from being my favourite fruit, but I saw them in the store, looking up at me from their basket, only $2.99. How could I resist? Sixteen peaches for only $2.99 is hard to pass up. I've eaten a fair few already on their own. Their softly fuzzy skin giving way to teeth with an almost inaudible crunch. Juicy and sweet, with only the slightest tang nipping playfully at the edges of your tongue.

But sixteen peaches is a lot for one person. So I needed more ways to eat them. They have served as a nice accompaniment to arugula salad, with goat cheese and pecans. Then my mom gave me a recipe for peach pancakes. They served as my lunch today.


I'll admit. They're not pretty. It turns out making pretty pancakes is not my strong suit. They always come out lumpy and deformed. Like amoebas. I had a lovely image in my mind. Perfect, round pancakes stacked like Pisa on my plate. Alas, it was not to be. My first attempt at flipping one resulted in this:


Yes, ladies and gentlemen, that is a pancake. Not an omelet. Though it bears uncanny resemblance to one. In any case they still tasted good. Fluffy and light, as pancakes should be, with cornmeal added for colour and texture. (Where would we be without cornmeal? It's so versatile) And delicious chunks of peaches. Softened by the heat, their sweetness heightened, the corners that poked from the batter lightly caramelized. They burst into summer between your teeth, surrounded by tender pancake.


Perhaps you will have more luck improving their appearance.

Cornmeal Peach Pancakes
From Anne Lindsay

3/4 cup cornmeal
3/4 cup all purpose flour
1/2 cup whole wheat flour
1 tbsp baking powder
1/2 tsp baking soda
2 eggs
2 cups milk
2 tbsp vegetable oil
1 1/2 cups chopped peaches

Mix the cornmeal, flours, sugar, baking powder, and baking soda.
Beat eggs until light and stir in milk and oil. Pour into flour mixture. Add peaches and stir until just incorporated.
Heat skillet over medium heat, grease with butter, and cook the pancakes until the batter bubbles on the surface. Flip and cook until golden brown.

I cut this recipe in half and it was still way too much for me to eat on my own. Also, I had no whole wheat flour, so I just used all purpose. They turned out fine, though I feel the whole wheat would serve to round out the flavour more fully.

On an separate note, I made more strawberry soup and froze it in popsicle molds. They are delicious. It's slightly tangier when frozen. I didn't strain out the seeds, but I think I might next time.


So here's to popsicles, and peaches, and a hot, sultry August.

Tuesday, July 27, 2010

Fried Green Tomatoes

No your eyes do not deceive you. This is in fact my second post in as many days. I made fried green tomatoes yesterday and they insisted on being mentioned. It was as though they were talking to me from the pan. Sizzling up at me, saying, "Don't forget about us."

How could I really? I love fried green tomatoes. I used to think my mom was a little weird for eating fried green tomatoes. They look a little unnatural. Firstly because my majority experience with tomatoes is with red ones. Second because once you dredge them in flour and brown them up in a pan they look a little rancid. Oh, but they're delicious!


Once you taste them, the brownish colouring they acquire in the pan will be absolutely tantalizing. And the smell. Honestly I think just about anything frying in a pan will smell good. For instance I don't really like onions, but when I smell them frying I swear I could eat them all. Fried green tomatoes smell like summer.

These particular ones came form my mom's garden and they were the best green tomatoes I've had in a while. This may be because I haven't had any since last summer, but truly these are some delicious tomatoes. Firm enough not to go to mush in the pan, with just enough sweetness to cut any bitterness.

Fried green tomatoes are perfect for a quick summer lunch or snack because they're almost laughably easy to make. No one wants to labour over food when it's hot outside. You can eat them on their own, as I usually do, but I imagine they would also be delicious on a sandwich, or tossed with pasta. I've been drooling over the thought of them on an English muffin topped with a poached egg. One of these mornings when I have time for a proper breakfast I'll give it a try.

For now it's your turn to experiment with them. Mix one part flour and one part cornmeal, add salt and pepper to taste. I'm not going to give you exact measurements because I never measure when I make these and how much you need really depends on how many tomatoes you're frying. Slice your tomatoes into rounds and coat both sides of the slice with your flour mixture.


Melt butter in a pan over medium heat and place the slices so they're not overlapping. After a couple minutes flip them with a fork. They should be nicely browned. A couple more minutes and ta-da! Fried green tomatoes. Repeat the process with the rest of the tomato slices.


The cornmeal is a wonderful addition that my mom discovered a couple years ago. It adds complexity of flavour and a nice texture contrast. If you don't have cornmeal you can absolutely make them with just flour, salt, and pepper. They'll still taste good, but I highly recommend the cornmeal. It's well worth the purchase and you can always use the rest of it for cornbread.

It's difficult to fully explain what fried green tomatoes taste like. I can't quite put my finger on it. There's something slightly tangy about them. Something of under-ripe fruit. Savory with the tiniest hint of sweetness. You'll just have to make them yourself to understand. They'll sizzle up at from the pan and say, "You won't be able to forget us anytime soon."