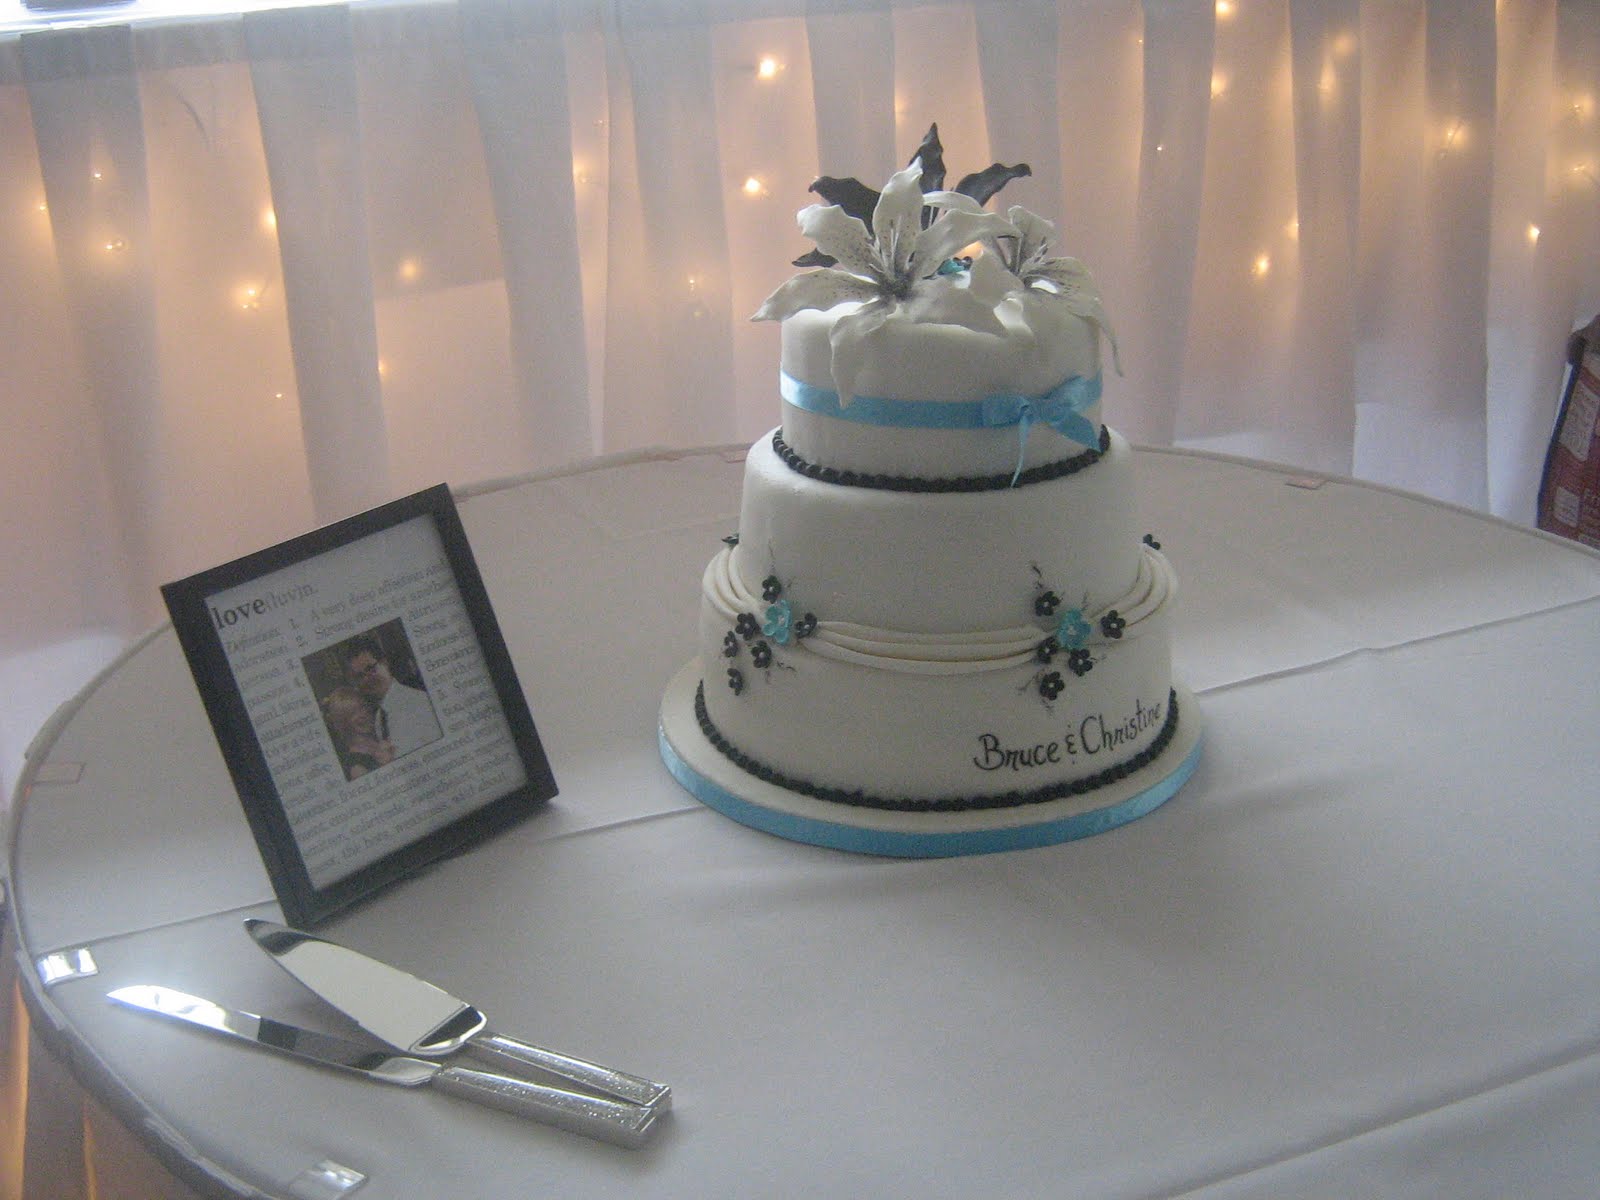
For the 6" cake top tier I used the white velvet cake found in Rose Levy Berenbaum's The Cake Bible. It can also be used to make cupcakes, though I didn't use it here. Instead I used a recipe of Lucy Waverman's found on the LCBO website. The icing is Italian buttercream, piped on with a #9 star tip.
It needs to be said that I am in love with Italian buttercream. It is so delightfully creamy and smooth. Every time I make something with it for people at work, one of my co-workers will comment on it. Not only is it delicious, it is also extremely stable. While it won't stand up to extreme heat in mid-summer, it sets up fantastically and can remain out of the fridge for hours on end, and even several days. Since I feel I owe you a recipe after such long gaps between posts, I will provide the recipe for Italian buttercream. People tend to be intimidated by it, but I promise it's not difficult. It just requires good timing and an accurate thermometer.

Before I get into that though, I just want to point out my gumpaste orchids. I was rather happy with them, having never made gumpaste orchids before. So, yes, I just want to brag a little. One of these days I'll have a post on making gumpaste flowers. It's really not as hard as it looks; it merely requires vast amounts of patience.
On to the buttercream then.
Italian Buttercream from Anna Olson's Another Cup of Sugar
12 egg whites
1/2 tsp cream of tartar
pinch of salt
1 cup sugar
1 1/2 cups sugar
1 1/2 cups water
4 1/2 cups butter
2 tsp vanilla extract
Whip egg whites with cream of tartar and salt until foamy. Gradually add 1 cup sugar while whipping and whip to soft peaks.
Boil 1 1/4 cup sugar with the water, without stirring, until it reaches 115C on a candy thermometer (soft ball stage).
Remove from heat and carefully pour down the side of the bowl of egg whites while whipping. Continue whipping until it has all been added and until the whites have cooled to room temperature (about 5 minutes).
While beating, gradually add in butter. Beat until smooth and add vanilla.
If using that day, keep at room temperature. It will keep in the fridge or freezer for quite some time, but be sure to bring it to room temperature before using and beat it to bring it back to a spreadable consistency.
A Couple Notes about Italian Buttercream:
1. The cream of tartar serves to help the egg whites whip up better. I have made the recipe without it and not encountered any problems, but I would recommend some kind of acid. If you don't have cream of tartar, throw in a teaspoon of lemon juice. It will do the job just as well.
2. If you don't have a thermometer you can scoop a bit of the sugar mixture and drop it into cold water. If it forms a 'soft ball' then it's ready. I do highly recommend a thermometer though.
3. DO NOT let it cook over 115C. If you do it will solidify when it hits the egg whites and not distribute properly throughout the mixture. The sugar is effectively cooking the egg whites into an Italian meringue so it is a crucial step. Make sure your thermometer works (test it in boiling water, it should be 100C) and calibrate it often.
4. Cooking sugar makes a lot of people nervous, so here's a good watch point: the majority of the cooking time is used mostly to boil off the water (which serves to prevent the sugar from burning); you can leave it largely unattended as long as you still see a significant amount of steam coming off it; as soon as the steam starts to dissipate keep a close eye on it; it only needs to cook for a couple more minutes past that point and the temp will climb quickly once the water is gone.
5. It is extremely important that you bring the egg whites back down to room temperature before adding the butter. If you don't, the butter will melt and you will end up with a curdled mess.
6. Another note on curdling: the icing will look as though it's curdling after you initially add the butter. Keep beating it and it will come back together. If it doesn't, see previous note, as that is likely the problem.
7. This is a gigantic recipe that only just fits in a very large bowl. It is intended for a four tier wedding cake (though I used three times the recipe for 150 cupcakes). So cut it in half, or quarter it. Whatever you feel comfortable with. You can always freeze the leftovers.
I swear it's not as scary as it looks. You just need to keep an eye on the watch points and you'll be fine. You can actually put the sugar on to cook right before you whip your egg whites and by the time they reach soft peaks it will be a few minutes away from the right temperature. It saves a lot of time. Organization is key. Make sure all your ingredients are ready to go before you start.
It's a very versatile icing, and people love it. So please give it a try. You will not be disappointed.