Tuesday, October 23, 2012
More than just a pear
This week in my produce box I received some gorgeous Bosc pears. My first instinct on beholding really firm pears is to poach them. Bosc pears hold their shape beautifully as the poaching liquid sweetens and softens them, spices them up a bit with whatever ingredients you choose. And I'd forgotten how simple they are to make.
I used David Lebovitz's comprehensive instructions for poaching pears, but I'll let you know which additions I used in the poaching syrup because they turned out perfectly. They even had my dad devouring them with enthusiasm and he's not usually one for dessert.
Along with the water and sugar I added a cinnamon stick, two anise stars, a teaspoon of cloves, three slices of fresh ginger, and about six allspice berries. The star anise rounds out the flavour by adding an element counter to the typical autumn spices, while the ginger added a gentle heat that just hovered on the edge of noticeable.
Once the pears were done I scooped them out with a slotted spoon and removed the spices so I could reduce the liquid to a syrup. It was all the pears needed, though they'd also pair well with spice cake or vanilla ice cream. I'm thinking a cardamom creme anglaise would also work.
You can make these pears ahead of time and store them in the fridge in the poaching liquid. When you're ready to serve them you can reheat them in the liquid and then reduce the syrup. The pears will stay warm while the syrup reduces.
The best thing about these pears is how satisfying they are. They're sweet enough to indulge your dessert craving, but light enough to follow a large meal. And they're so easy. They offer maximum flavour with minimal effort. They're simple enough to serve after a weekday meal, but impressive enough to serve guests at a dinner party. And they are the perfect end to a crisp autumn day.
Monday, May 28, 2012
A lemon named curd
Look how lovely and pink it is. And the layers are subtly different shades. I fell in love as soon as I saw the picture of it here. Theirs is a little nicer looking than mine, but they have food stylists, and I do not. So there.
Anyway, I wanted to talk less about the cake and more about the lemon curd I used in the middle. As per usual I deviated from the original recipe when it came to icing and filling. I used my Italian buttercream recipe from this post, adding a teaspoon of lemon extract along with the vanilla.
And for the middle layer I used Anna Olson's lemon curd recipe. I folded in a cup of whipped cream (holding stiff peaks) to turn it into a sort of impromptu mousse, but you could use it all on it's own. The curd comes from a recipe for warm lemon sponge, which I would highly recommend making in it's entirety. It's exactly how it sounds. And the curd provides a beautiful contrast of texture nestled in the middle of the individual cakes.
'Curd' is a very unfortunate word, I think. Probably because the mind immediately jumps to 'curdled' and there's not much that's more disgusting than curdled dairy. Please don't let this deter you. Think of it as lemon custard if you must. Because that is actually all it is.
The Anna Olson recipe is my standby whenever I need lemon curd. As I'm sure you've already guessed, it's extraordinarily easy. And it's always worked out for me, which is more than I can say for just about every other recipe I've ever made. I think it's safe to say it's pretty fool proof. The trick is to whisk it the entire time so as to avoid any lumps. The butter will remain in chunks until it's heated up enough to melt, but don't worry, it will be fine.
When you chill it, just be sure you place a piece of saran wrap directly on the surface to prevent it from forming a skin.
The lemon flavour you get out of this is divine, with just the right balance of tangy and sweet. It's bright and refreshing and so smooth and creamy. I don't even mind the bits of zest in it. That's a big deal. Just ask my mom.
So keep it in your recipe book. Use it to fill cakes, fruit tarts, cream puffs. Dip strawberries in it, spread it on toast. Or eat it right out of the bowl with a spoon. Just as long as you try it. However you might feel about the word 'curd'.
Tuesday, April 24, 2012
A bit of zest
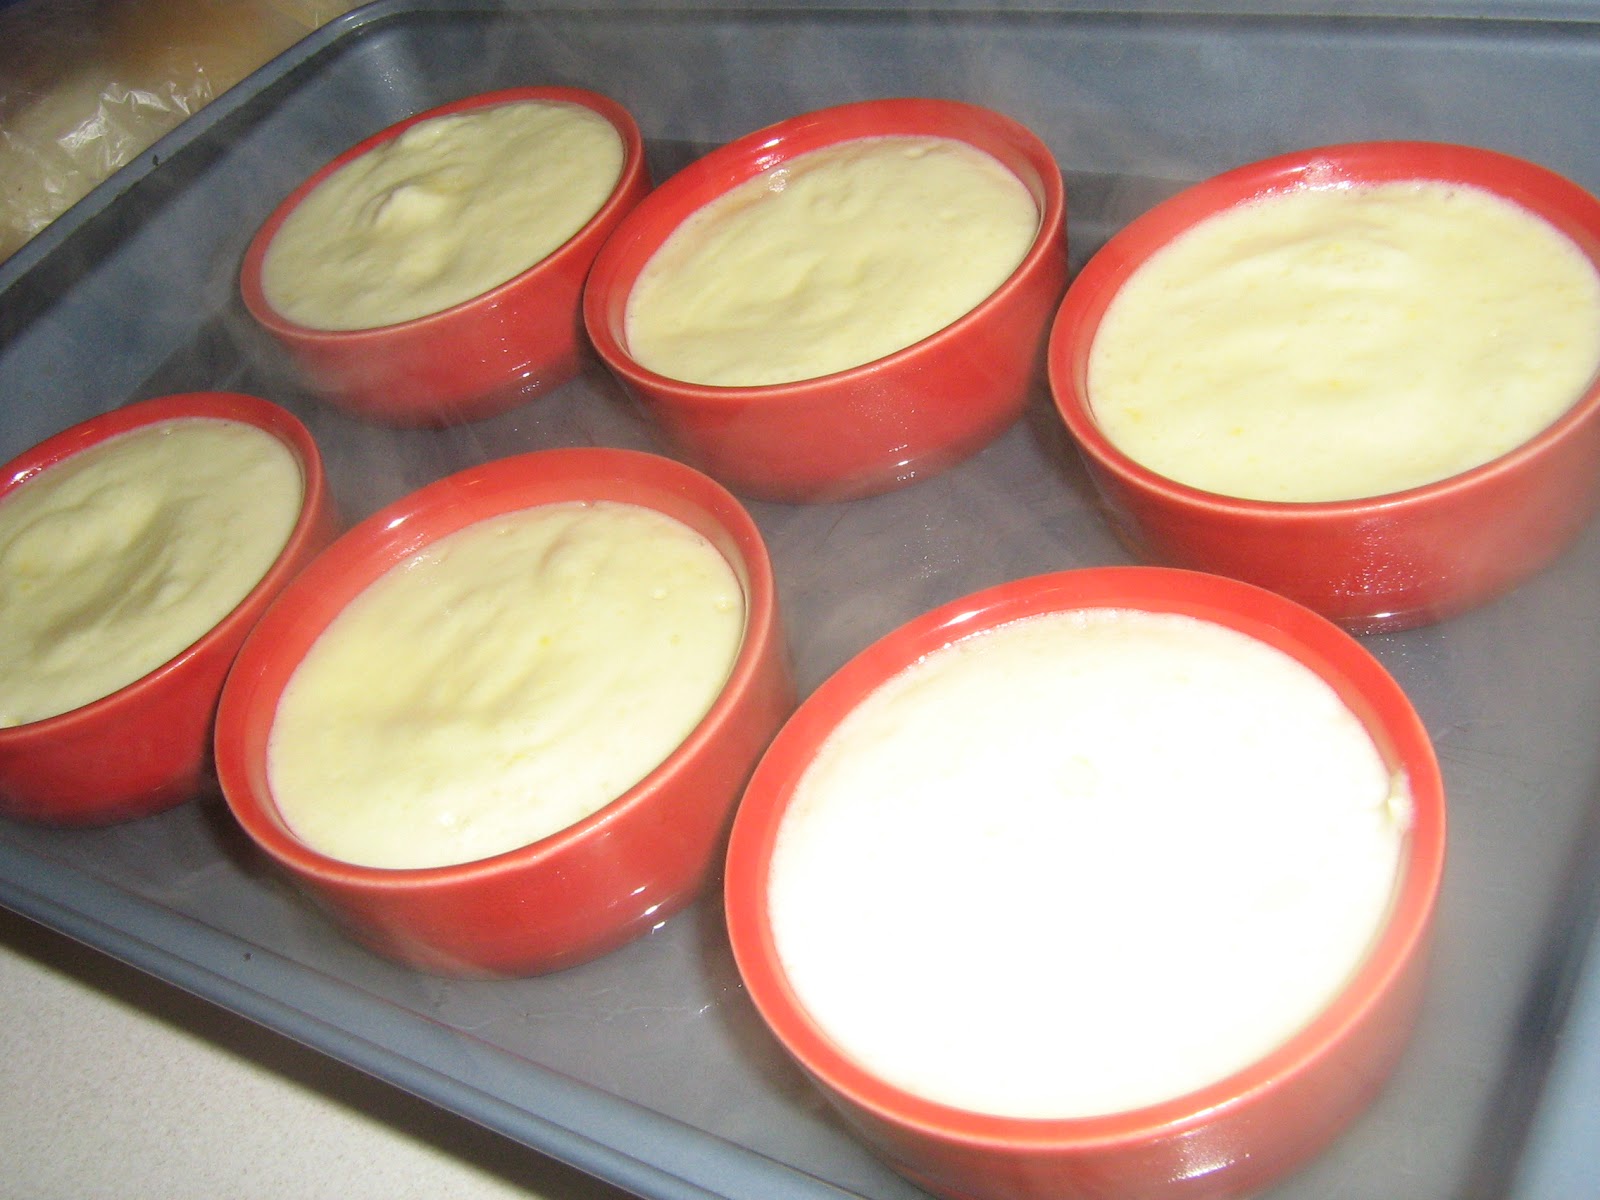
They stay cakey and almost souffle-like at the top while forming a sort of lemon curd at the bottom. It's delicious. Tangy without being overwhelming and refreshing after a full meal. That's the best thing about lemon desserts. There's always room for a bit more.
The recipe comes from Anna Olson, whose desserts never disappoint. So without further ado, here it is.
Lemon Pudding Cakes
6 tbsp unsalted butter
2/3 cup sugar
4 lemons, zest and juice
4 eggs, separated
1/2 cup flour
1/2 tsp baking powder
1/2 cup 2% milk
Beat butter and sugar. Add zest and lemon juice, then egg yolks, one at a time. As mentioned above, it will likely curdle. Don't panic! It'll be fine.
Add flour and baking powder, then milk, a little at a time, until you have a mostly smooth mixture.
Whip egg whites to stiff peaks and then fold into batter.
Pour batter into ramekins and place into a pan. Pour boiling water into pan so that it comes about halfway up the sides of the ramekins.
Bake for 35 minutes in a 350F oven.
They should be golden brown on the top when they're done.
They're going to fall a bit once they've sat out of the oven for a bit, but they'll still taste delicious. I crushed some raspberries with a bit of sugar to add extra colour and another layer of flavour. And raspberries pair so well with lemon that I couldn't resist.
Wednesday, March 14, 2012
Cream Puffs and Belated Gifts
The other day I made cream puffs because I owed my friend Sarah for Christmas. They were, in fact, meant to be her gift, but like everything else in my life of late, they were postponed in favour of work. So she gets her Christmas present in March.
It's been awhile since I've made choux paste and I'd forgotten how wonderfully easy it is. Honestly, I think cream puffs and eclairs will be my new stand-by recipe for dessert in a bind. They really are that simple. They also have the benefit of simple ingredients. You'll just want to make sure you have a lot of eggs.
And without further ado:
Choux Paste
1/2 cup milk
1/2 cup water
1/2 cup butter, unsalted
1/2 tsp salt
1 cup + 3 tbsp flour
4 eggs
Preheat oven to 475F and line trays with parchment.
Bring the milk, water, butter, and salt to a rolling boil. Remove from heat and add flour all at once, stirring to incorporate. Return to heat and stir vigorously until the mixture pulls away from the sides of the pot. (This happens relatively quickly.)
Place in a stand mixer fitted with a paddle attachment, or transfer to a bowl and beat with a hand mixer, and mix until the dough has cooled slightly, but is still fairly hot.
Add eggs one at a time, mixing until fully incorporated after each addition.
Pipe using a large straight tip (I used #309), or scoop by tablespoon, onto parchment lined trays about one inch apart. You can also pipe them into logs if you want to make eclairs.
In the meantime, make your pastry cream. I have nothing but good things to say about pastry cream, which is simply a stirred custard. It is delightfully simple to make, can be made the day before use and refrigerated, and I would not be above eating it out of the bowl with a spoon.
Pastry Cream
2 cups milk
2 tsp vanilla extract
8 egg yolks
4 tbsp sugar
5 tbsp cornstarch
3 tbsp butter, unsalted
Place milk and vanilla in a saucepan and bring to a simmer.
Combine egg yolks, sugar, and cornstarch. In a steady stream pour scalding milk into egg mixture while whisking. Once most of the milk is incorporated, return to heat and cook until thickened, stirring with a whisk the whole time. When it starts to bubble, keep cooking for one minute and then remove from heat.
Stir in butter. Transfer to a bowl, cover with plastic wrap directly on the surface of the custard to prevent a skin from forming, and refrigerate until ready to use.
Once your choux paste shells are cool, cut them in half using a serrated knife and pipe cooled pastry cream between the two halves.
If you want to make the choux paste ahead of time, just freeze the empty shells and thaw them completely before filling them. This prevents them from getting soggy when the filling sits in them too long.
You can add any flavouring you like to your pastry cream, either in place of the vanilla, or after it's cooked if your using alcohol (such as brandy). And if you'd prefer a lighter filling, fold in some whipped cream until you reach the desired consistency. There's really no rule for this, though 50/50 is probably a good way to go. This method is called frenching (no, not that kind of frenching.)
If you're feeling really ambitious, melt some chocolate and paint it on the tops of your cream puffs. Or if you're like me, and don't feel like making more work for yourself, just dust them with icing sugar and enjoy!
Thursday, December 8, 2011
Guinness and Red Velvet
However, a couple weeks ago my sister asked if I would make red velvet cupcakes for a baby shower and I said yes because why not? I hadn't made cupcakes in a while, and I had yet to break in my shiny new KitchenAid stand mixer (which is heaven, by the way). And after making them, and decorating them, I stopped and realized I'd really enjoyed the entire process. I'd had fun. So all is not lost on the baking front. I just need some variety.
The red velvet recipe I used was from Martha Stewart and they got rave reviews. Now, confession, I never actually tried one because I didn't have any extras. So I can't actually give you a run down on what they tasted like or the merits of the recipe. I can tell you that if you're going to make red velvet cupcakes I highly recommend investing in some high quality red food colouring, because you use so much less than the grocery store variety (Club House, etc.).
Also, when doubling the recipe make sure you've doubled all the ingredients, because it's not fun emptying batter back into the bowl after scooping half of it into cupcake cups when you realize you're short on flour and that's why it looks a lot like soup.
Another confession, what I like best about red velvet cake of any kind? The cream cheese icing. I am actually always mildly concerned about red velvet cake because that (see below) requires a lot of food dye.
I would like to find a recipe that uses beet juice to get the colour, I know they're out there, and when I find and test one I'll let you know.
On an entirely separate note: isn't my stand mixer pretty?
As always I overestimated the amount of icing I needed for decorating. There is almost nothing I hate more than running out of icing when I'm baking and having to make more in the middle of decorating, so I always err of the side of way too much. Especially having run out of icing when you really don't want to (i.e. weddings). So I decided that I would make more cupcakes and use up what was left of the cream cheese icing.
I settled on Guinness Chocolate Cupcakes. This recipe is all over the internet on different blogs and websites and I couldn't find the one I used the first time I made them this past March, but this time I used the one here and they tasted exactly the same.
These cupcakes are divine. I mean really, just so good. I'm going to have to keep this cake recipe around to use in layer cakes because chocolate cake was meant to taste this way. The Guinness rounds out the flavour beautifully and adds just a hint of something, a bit bitter, a bit sweet, a bit 'please sir, I want some more.' I really can't say enough about this cake except: make it! Make it now!
They bake up wonderfully and have a gorgeous texture, kept moist by the sour cream. I had a picture of them baking in the oven that I was going to post until I realized that the flash had betrayed how truly filthy the back of my oven is, so you get them post-baking instead. One day when (if) I clean my oven I'll have mid-bake pictures for you.
The first time I made them I did use the whiskey ganache and the Bailey's icing that accompany the cake recipe and they are completely worth it. It's the best of the Irish wrapped up in a cupcake. On the other hand I would eat them plain, no icing, no ganache, nothing. Just the cake. That's how good they are. So seriously, if you're going to be making cupcakes any time soon, make these ones. They might even help you fall in love with baking again.
Wednesday, September 7, 2011
September
I was originally going to talk about the lemon curd that I used as a cake filling recently, but then I decided I needed to talk to you about the cake itself. So I'll save the lemon curd for later.
First, I have a confession to make--I don't really like cake. Oftentimes when I make one I rely on other people to let me know if it's good. For me, I take a bite and think well, it tastes like cake, nothing special. And this cake was much the same for me. But other people rave about it.
Also, it bakes up beautifully. This is where I find merit with this cake. The recipe is relatively simple, it bakes evenly, slices smoothly to reveal a gorgeous crumb, and stands up well to being tiered. This was the second time I've used the recipe and it's one that I will continue to go back to when I need a versatile white cake.
The recipe was originally published in the Holiday 2009 edition of Food and Drink magazine. As per usual I changed a few things to suit myself. The recipe provided is complete with it's own filling and icing, which I disregarded in favour of my own. I used a wonderful lemon curd from Anna Olson (who, incidentally, also created this cake recipe) and the Italian buttercream icing that can be found at one of my earlier posts here.
I had fun playing with piping techniques for the decorations around the side of the cake. And then came the flags. I left them for last for obvious reasons and the entire time I was decorating the rest of it I was labouring under the impression that the Canadian flag was going to give me the most trouble.
Wrong.
The British Flag is deceptive in its apparent simplicity. Let me tell you when something is symmetrical both vertically and horizontally it is going to give you trouble. I drew about five or six on parchment paper before I was brave enough to go the cake itself--compared to the two Canadian flags I practiced.
I guess all those years in elementary school drawing the Canadian flag actually paid off. Who knew?
Lady Baltimore Cake
2½ cups pastry flour
1 tbsp baking powder
¾ tsp salt
¾ cup unsalted butter, room temperature
2 cups granulated sugar
1 tsp pure vanilla extract
1 tsp finely grated lemon zest
½ cup 2% milk, room temperature
½ cup water, room temperature
6 large egg whites, room temperature
¼ tsp cream of tartar
Preheat oven to 350F. Grease the sides and line the bottoms of two 9" round cake pans with parchment paper.
Sift together flour, baking powder and salt (alternatively, mix them together with a whisk because sifting is a pain).
In a separate bowl cream butter and sugar until smooth. Beat in vanilla and lemon zest.
Combine milk and water and add alternately with the flour to the butter mixture, starting and ending with the flour.
With clean beaters (make sure they're grease-free) whip egg whites and cream of tartar to medium peaks. Fold into the cake batter in two additions.
Spread evenly into cake pans and level. Bake for 30-40 minutes. The tops should be slightly browned and spring back when pressed lightly with your finger.
Cool for 30 minutes before turning out of the pans.
The original recipe calls for tangerine zest rather than lemon, but I was going for lemon here, so I changed it. If you're looking for a plain white cake, no citrus to be found, just leave it out altogether, though I would probably throw in an extra teaspoon of vanilla extract in that case. Also, as usual, I didn't use cream of tartar because I just don't have any. Throw in a splash of lemon juice to achieve the same effect.
Another note--whenever I make a cake I use simple syrup on each layer to keep it moist. It's extremely easy to make. Just pour about a cup of sugar (you can eye-ball it, exact quantities are not important here) into a pot and add just enough water that the sugar is covered and completely wet. Bring to a boil then remove from heat and allow to cool completely. You can store it in the fridge and it will keep for several days. When you're ready to use it just add a splash of water to dilute it and thin it out. I used water and lemon juice to punch up the lemon a bit more.
Most importantly: enjoy! Or at the very least watch everyone else enjoy.
Friday, March 11, 2011
Sea and Sun
These vacations never last long enough. Especially when you come home to a fresh layer of snow. Especially when I managed to avoid sustaining any serious sunburns (a feat previously unheard of when I'm in tropical climes). Especially when the water is this blue.
But let's be honest. The reason I'm mentioning this vacation here at all is because of food. The day we went into town for some shopping we stopped for lunch at this little Italian restaurant called Cafe Matisse. It was tucked away in the midst of some legal buildings, it's walls covered in the lively, colourful works of Matisse.
But I'm holding you in suspense, aren't I? You want to know what this beautiful concoction of red and green is. Well let me tell you. This dessert is avocado mousse with raspberry coulis. It was easily one the best things I've ever tasted. The term mousse is used rather loosely here I think. It wasn't actually set with anything as a mousses usually is. It had more of the consistency of slightly runny pudding. I wish I had a better way of describing it because I fear nothing I say is really going to do it justice. It was smooth and subtly sweet. Avocados lend such an unbelievable buttery texture to everything that it was like eating liquid silk. Sweet, creamy liquid silk.
On a completely separate and unrelated note, I do not forget the last promise I made to provide a recipe this post. So here is one for some cookies I made a few days before we left for vacation. They are Banana-Walnut Chocolate-Chunk Cookies from Martha Stewart and they got rave reviews from everyone that tried them. They're like a hybrid between chocolate chip cookies and banana bread. Truly warm and comforting on a cold day.
1 cup all-purpose flour
1/2 cup whole wheat flour
1 tsp salt
1/2 tsp baking soda
3/4 cup unsalted butter, softened
1/2 cup granulated sugar
1/2 cup packed brown sugar
1 large egg
1 1/2 tsp vanilla extract
1/2 cup mashed ripe banana (about 1 large)
1 cup rolled oats
8 ounces chocolate chips
1/2 cup coarsely chopped walnuts
Preheat oven to 375F. Combine flours, salt, and baking soda in a bowl.
Cream butter and sugars until pale and fluffy. Add egg and vanilla and mix until combined. Mix in banana. Add flour mixture and mix just until combined. Add oats, chocolate, and nuts.
Using a 1 1/2 inch ice cream scoop, or two spoons, drop dough onto a baking sheet about an inch apart. Bake 13 minutes.
This recipe doubles easily without being excessively large. It will still fit nicely in your large mixing bowl. Also, I used pecans instead of walnuts, since that's what I had in the cupboard. I also didn't have enough chocolate, but that's the glorious thing about what gets mixed into a dough. The quantities aren't really important. So pour a glass of milk and enjoy!
Saturday, December 11, 2010
Room4Dessert
This week at school was our event/exam week. The final test this year culminated in an event, called Room4Dessert, for which people could purchase tickets and taste our final products. Each group of four was to come up with a verrine (layered dessert), two-bite pastry, preserve, bread or cracker, and two chocolates, one dipped and one molded.
After weeks of preparation, some not so successful test runs, a lot of stress, and more than a little frustration we finally came to end. And, it has to be said, quite successfully. I don't think I'm the only one who would say the event was a resounding success. Everyone turned out some fabulous desserts and the guests all appeared to enjoy themselves.
Below is a picture of my group's table. As you can see our theme was citrus. The chocolates were boxed and at a separate table.
The gin and tonic jelly was quite a favourite. It's really like a sweeter gin and tonic. It's light and has a gentle bite to it as the gin makes itself known. It's also quite pretty. It has a subtle yellowish colour and sort of glitters. Perhaps from the air bubbles that get trapped from the tonic water. I got the recipe from Nigella Lawson's How to be a Domestic Goddess and I've included it at the bottom of the post. It's like Jell-O for grown-ups.
We paired it with a thyme cracker. The recipe which can be found at Martha Stewart's website. They're extremely easy to make and delicious. Crisp and a bit salty with the thyme adding extra flavour. They make you never want to buy crackers again.
The grapefruit marmalade we paired with it was quite tangy, but ended up with a nice flavour once we added some oranges after the fact. The recipe for that can be found here, but be sure to blanch the peel before making it by boiling it, draining it, and shocking it with cold water three times or you'll end up with some very bitter marmalade. Also, we had some thermometer trouble when trying to bring it up to the right temperature. I think perhaps going by the timing would work better than going by temp. Much longer and ours would have burned.
Below you'll see our chocolates. The molded one has a white chocolate Grand Marnier center and the dipped one with the candied mint on top has a white chocolate lemon mint center.
Overall we enjoyed the evening and we were happy with the outcome. It's always much more exciting when you get to watch people enjoy what you've made. It is the best part of baking, in my opinion. At the end of it, watching someone's face light up as they eat something you've made them.
Gin and Tonic Jelly from Nigella Lawson
300 mL Water
300 g Caster sugar
2 Lemons
400 mL Tonic water
250 mL Gin
8 sheets Gelatin
Boil sugar and water for 5 minutes.
Add lemon zest and steep, covered, for 15 minutes.
Strain out the lemon zest and add the gin, tonic water, and lemon juice. You should have 1200mL, if not, top it up with a liquid (gin, tonic water, or lemon juice).
Soak gelatin in cold water and boil 50mL of water. Squeeze out the gelatin to removed excess water and whisk into the boiling water.
Remove a about 1/2 cup of the gin mixture and whisk in the gelatin. Then return it to the rest of the mixture and stir it together.
Pour into a mold and let set for six hours.
If using a jelly mold set it in a warm water bath to loosen it before removal.
Grand Marnier Savarin with Cardamom Mousseline
30 g. Yeast
120 ml Water
334 g. Bread flour
20 g. Milk powder
40 g. Sugar
5 Eggs
6 g. Salt
166 g. Butter, melted
82 g. Mixed Peel or currants (optional)
If you have a stand mixer use the bread hook attachment.
Combine yeast and water in the bowl and mix together to create a slurry.
Place sifted flour, milk powder, sugar, eggs, and salt on top and mix.
Knead dough until the dough stretches when pulled gently to form a translucent 'window' so to speak. Pull off a small piece and gently pull it to check.
The dough will be very soft.
In a bowl place the melted butter on top and mix in thoroughly.
Punch down and rest another 10 min.
Add peel or currants to the dough.
Grease 3 standard muffin tins or savarin molds and fill half way.
Let sit in a warm place until the dough rises almost to the rim.
Bake at 385ºF until golden brown and unmold soon after they come out of the oven.
Pour the hot syrup evenly into the muffin tins (about half way) and place the savarins back into the tins to absorb the syrup.
Invert onto a drying rack so that any excess syrup can drip out.
Soaking Syrup
834 ml. Water
250 g. Sugar
Zest of 1 lemon
Zest of 1 orange
5 g. Vanilla, pure
Salt, pinch
120 ml Grand Marnier
Boil everything except the Grand Marnier and let sit for about 20 minutes to steep.
Bring back to a boil and strain to remove zest.
Stir in Grand Marnier.
Note: You can make the syrup ahead of time and store in the fridge. Just be sure to reheat it before soaking the cakes and add the Grand Marnier after you've heated it so that none of it cooks off.
Cardamom Mousseline
85 g. sugar
6 egg yolks
cardamom to taste
1 tsp. vanilla
1/3 cup (80ml) boiling water
1 1/2 cups (360 ml) 35% cream
Whisk together sugar, yolks, cardamom, and vanilla extract.
Whisk in boiling water and then whisk mixture over simmering water to ribbon stage. It will thicken and will not sink back into the mixture immediately when drizzled on top of itself.
Whisk to cool.
Whip cream and fold into cooled mixture.
To assemble place small segments of orange and banana on top of the savarin.
Pour about 1/2 tsp more of Grand Marnier over each one.
Top with a dollop of mousseline and a piece of caramalized banana.
Note: To caramelize the bananas, cut rounds into thirds and toss in sugar. Using a creme brulee torch, torch each piece to brown. Alternatively cook them in a pan on low heat.
Sorry about all the metric measurements. They're my school recipes. I will try and convert them and update this as soon as I do. On a related note, a kitchen scale is very handy to have, especially when working out of British cookbooks, which always use metric measurements.
Saturday, September 25, 2010
An Apple a Day
I think the love of apples is fairly universal. Why else would they feature in so many of our recipes? It's also one of the only fruits that people know by variety. An orange, for the most part, is an orange (yes, I'm going to compare apples and oranges), a banana is a banana, grapes don't go much past red and green. But apples we know. Braeburn, Granny Smith, Golden Delicious, MacIntosh, Northern Spy, Royal Gala. These are names people recognize. Because we treat our apples differently than other fruit. We give them a bit more respect.
Apples will always remind me of fall. Their crisp sweetness reminiscent of a fall breeze cutting across the hot summer air. Their flavour grounds us after the heady heat of the previous season and gives us something to look forward to. And what better way to usher in autumn than with apple pie?
I love apple pie almost any time of year, but something about baked apples begs to be paired with trees that are on fire with colour. They caramelize so beautifully in the oven. Their sweet juices reach a deeper level of flavour, one that's not too sweet if properly spiced.
The trick to apple pie is two-fold. The first is the apples. They have to be fresh and crunchy. Soft, overripe apples will turn to mush in the oven. Pick ones with a good balance of sweet and tart. Cortland, Gala, Granny Smith, and MacIntosh all work beautifully for baking. I used a combination of Royal Gala and Granny Smith for this pie. I always like throwing in some Granny Smith apples because their tartness is tempered when baked and it's a sure way of making sure your pie isn't too sweet. The second factor is your pie crust. I'm not going to pretend to be a master of pie crust, but the key to flaky pie crust is to avoid overworking it. Mix it only until it just comes together, don't use too much flour when rolling it out, and don't re-roll it. Try to get it right on the first shot.
The recipe I'm going to give you is one that I got from Williams-Sonoma's Pie and Tart cookbook. One thing I find can destroy a good pie is too much crust...no matter how flaky it happens to be. This recipe eliminates that problem by topping it with streusel rather than more pie dough. It's like a cross between a crisp and a pie, bringing the best elements of both together.
Apple Streusel Pie
Basic Pie Dough
1 1/4 cups flour
1 tbsp sugar
1/4 tsp salt
1/2 cup cold butter, cut into cubes
3 tbsp very cold water
Streusel Topping
1/2 cup flour
1/3 cup brown sugar, packed
1 tsp ground cinnamon
1/4 tsp salt
5 tbsp cold butter, cut into cubes
Apple Filling
6 apples, peeled, cored, and diced
1 tbsp lemon juice
1/3 cup sugar
2 tbsp cornstarch
1 tsp ground cinnamon
1/2 tsp ground nutmeg
1/4 tsp ground cloves
pinch of salt
For the pie dough, combine the flour, sugar and salt.
Cut in the butter with a pastry blender or two knives until it resembles cornmeal with no butter pieces larger than a small pea. (You can also use your fingers to blend this, just be sure not to soften the butter too much with your body heat.)
Add the water and mix with a fork just until it comes together.
Form into a disk and tap a few times with a rolling pin to flatten it.
Roll out to at least 12" in diameter and place in 9" pie pan.
Flute the edges and refrigerate until ready to use.
For the streusel, combine flour, sugar, cinnamon, and salt.
Cut in butter as with pie dough.
Refrigerate until ready to use.
For the filling, toss diced apples with the lemon juice (this stops them from going brown).
In a separate bowl combine sugar, cornstarch, spices, and salt.
Sprinkle over apples and toss to combine.
To assemble, pour apples into pie shell and cover evenly with streusel topping.
Bake at 375F for 50-60 minutes until the topping is golden and the filling is bubbling.
This is best eaten the day it's made. If you don't finish it the day of, keep it at room temperature if it's only going to hang around for a couple days. The cold of the fridge will break down the cornstarch causing the filling to go soupy.
As always feel free to play with this recipe. I mostly stuck to it this time, but I didn't have ground cloves so I added a bit more cinnamon and nutmeg (not too much though, these are potent). The variety of apples will change the flavour, so try different kinds until you find the one you like best. Add different spices for variety. Throw in some raisins. Whatever catches your fancy.
Above all, eat apples. After all, they're said to keep the doctor away. Let's dig in to an autumn full of apples.
Tuesday, June 22, 2010
Father's Day
So for father's day I couldn't very well not think about dessert. He may not be big on dessert, but he loves orange chocolate. I have a lovely recipe for lemon cheesecake mousse that I've used on several occasions so I decided it could be adapted with oranges and put in a chocolate tart.
It turned out beautifully. A lovely smooth, creamy orange mousse in a crumbly chocolate tart. I topped it with strawberries soaked in Grand Marnier, to both compliment and punch up the orange. Definitely a hit. It was delicious. So without further ado: the recipe.
Orange Cheesecake Mousse with Strawberries and Grand Marnier
Chocolate Crust
1/4 cup toasted almonds
1/4 cup sugar
1 cup all purpose flour
1/4 cup cocoa powder
1/4 tsp salt
6 tbsp butter, chilled and cut in pieces
3 egg yolks
1 tsp vanilla extract
1. Pulse nuts in food processor with sugar, flour, cocoa, and salt.
2. Add butter and pulse until crumbly
3. Add egg yolks and vanilla and pulse until it comes together.
4. Press into greased muffin tins, dock with a fork, and bake at 350F.
*If you don't have a food processor big enough to fit the whole recipe just grind up the almonds and mix it all together by hand. Rub in the butter with your fingers and then mash in the liquids with a fork.
Orange Cheesecake Mousse
3/4 cup whipping cream
6 oz cream cheese at room temperature
1/2 cup sugar
1/2 tbsp orange zest
1/4 cup orange juice
dash of vanilla extract
2 cups strawberries, quartered
2 tbsp Grand Marnier
1. Whip cream to medium peaks and chill.
2. Toss strawberries in Grand Marnier and chill.
3. Beat cream cheese until smooth, beat in sugar and zest, then juice and vanilla.
4. Fold in cream in two additions.
5. Pipe or scoop into tart shells and garnish with strawberries.
Of course you can stick to Anna Olson's original recipe and use lemon rather than orange. Top with any berries you want. Blueberries would work well with lemon, as would blackberries. Raspberries would be nice with orange. Anything that takes your fancy really. I'm suddenly stuck by the idea of using passionfruit in the mousse...inspiration for next time!
Saturday, June 12, 2010
Amandine
For me, and probably for many of my family members, brandy snaps mean Christmas. I do realize it's the middle of June, so Christmas treats aren't exactly in season, but who says they can only be eaten at Christmas? Anyway, every Christmas, without fail, my grandmother makes brandy snaps. She strategically keeps them hidden away in tins until the dinner table has been cleared of the evening meal. There's always a bit of a gap between dinner and dessert at Christmas. We have to digest the turkey and work up our appetites again. Then she places the plate of brandy snaps on the table. They're gone in seconds. I don't think it's possible for them to hang around for more than a minute. My cousins and I tease each other, threatening to eat the others' precious treats.
To really give you an idea of the reverence in which we hold the brandy snap I'll give you a little anecdote. A couple years ago my cousin Natalie and I were bringing the tins of brandy snaps up to my grandmother to be filled with cream. We were, of course, joking around, acting as though we would steal the entire contents of the tins for ourselves, when she dropped one of them. Given the fragile nature of brandy snaps, they shattered. My grandmother took it in stride, but I thought Nat was going to cry. My grown up, adult cousin had a look on her face as though she'd ruined Christmas. Literally. She hadn't of course. Though there was a bit of a silent shock in the room. A momentary panic where we contemplated the horror of no brandy snaps. But the other tin was perfect and whole, so we filled those, took the broken bits and mixed them up with the left over whipped cream and turned it into a kind of caramelly Eton Mess.
Some members of my family will probably consider it base treachery that I'm about to give you this recipe. We have a funny thing about recipes. But upon discovering several other recipes floating around on the wide web that are nearly identical, and all curiously devoid of brandy, I don't feel too badly about it.
Grandma Bull's Brandy Snaps
3 tbsp golden syrup
3 oz butter
1/3 cup brown sugar, lightly packed
2 tsp ground ginger
1/2 cup plain flour
pinch of salt
1. Place syrup, butter, and sugar in a saucepan and stir over low heat until butter melts. Remove from heat and add sifted flour, ginger, and salt. Mix together well.
2. For small brandy snaps use level teaspoonfuls, heaping teaspoonfuls for larger ones.
Drop onto lightly greased tray (or silpat lined if you happen to have one, silpats are a godsend for making these and various tuilles). Make sure to allow room for spread, there will be a lot of it.
3. Bake in moderate oven for 5 minutes, about three at a time, until golden brown. Remove from oven and allow to cool about a minute.
4. Lift them off the tray one at a time and wrap around the handle of a wooden spoon. Allow to cool on the handle.
5. Fill with whipped cream right before serving.
Some notes:
*You can store the brandy snaps, unfilled, in air tight containers for some time (I'm pretty sure my grandmother keeps them around for at least a week).
*Once filled they will go soft and mushy within hours, so don't fill them until you're ready to serve them, otherwise they fall entirely short of their name by neither containing brandy nor having any snap.
*Once out of the oven they will harden quickly so you have to work fairly fast. Don't be discouraged if the first few don't work out. Practice makes perfect and you can always bake only one or two at a time until you get the hang of it. I think my grandmother can do about five or six at a time, but then she's been making them for years. If you find you get through two and the third has hardened up too much, throw it back in the oven just to warm it up and make it malleable again, but be careful not to burn it.